 Delicious dish of Spinach with paneer....
Cube of cottage cheese simmered in a rich spinach gravy. A perfect dish for Sunday lunch when everybody is in the mood for a lavish meal before an afternoon rest……:)
 Recipe for microwave cooking...
Ingredients:
300 gm Palak (spinach)
100 gm paneer
2 medium size onions
4-5 fresh green chillies
1 piece of ginger
1 tbsp garam masala
½ tbsp coriander+cumin seeds powder
¼ tbsp turmeric powder (haldi)
3 tbsp oil
Salt to taste
 Method:
Step 1: Wash & drain the water from Spinach. Chopped them coarsely.
 Step 2: Cut the paneer into thick strips and keep aside.
 Step 3: Place the chopped spinach on a microwave safe dish.
 Step 4: Microwave on high for 2 minutes.
 Step 5: When all the leaves is become soft Blend in a liquidizer to a smooth puree and keep aside.
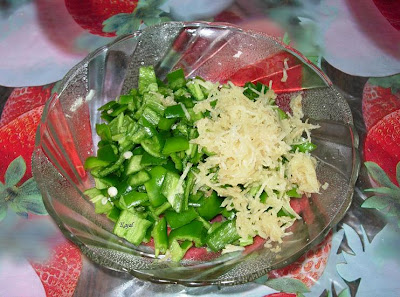
 Step 6: Peel the onion. Coarsely chopped the onion, green chillies and ginger piece.
 Step 7: Blend the onion green chillies and ginger to a smooth paste.
 Step 8: In microwave safe bowl, add the oil and the ground paste of onion.
 Step 9: Microwave on high for one minute.
 Step 10: Add coriander+ cumin seeds powder, turmeric powder, garam masala and salt to taste.
 Step 11: Add the spinach puree and mix well.
  Step 12: Microwave on high for 5 minutes.
 Step 13: Add the paneer cubs, and mix well.
 Step 14: Microwave on high for a minute.
Step 15: Serve hot with Roti , jeera rice and dal...great meal for sunday...enjoy it:)

I thank God I'm rich not with money but with people like you. I may not have the most expensive things but I've got a most precious gem. a friend like you.
If all my friends were to jump off a bridge, I wouldn't jump with them; I'd be at the bottom to catch them. :)
 Ingredients
 Step 2: Wash the thick poha with cool water until moistened, turn poha over with your hand to ensure all poha is damp, but not soggy.
 Step 4: When the milk is boiled, add the moist poha, lemon juice, mix well and sauté on low flame, while stirring continuously.
 Step 5: In other small pan heat the oil, add the grated ginger and green chillies.
 Step 6: Sauté on a medium flame for a few seconds.
 Step 7: Remove from the flame and pour this tempering over the boiled poha on other flame.
 Step 8: Stirring continuously, when the the pohas soak all the milk and is becomes a thick consistency turn off the flame.
 Step 9: Place immediately into a greased thali evenly to make a uniform layer using a spatula while the batter is still hot.
  Step 10: When cool cut the Khaman into square pieces.
 Step 12: Add the mustard seeds, when the seeds crackle, remove from the flame.
 Step 13: Pour this tempering over the khamans and garnished with coriander and coconut.
 Step 14: Serve immediately.
  Message for coming year...


 Step 2: Add shred jaggery in it.
 Step 3: Melt nicely on medium flame.
  Step 4: When its color is slightly change in dark side then add sesame seeds and continuously stirring.
 Step 5: In low flame mix jaggery and sesame seeds very well within a minute then turn off the flame.
 Step 6: Grease a tray or any clean surface and roller of roti before start to make chikki.
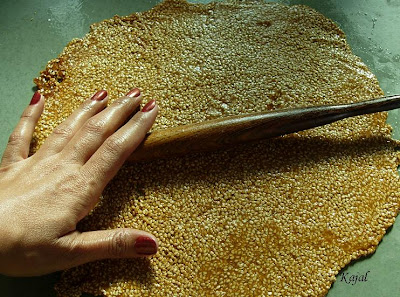
  Step 7: When you turn off the flame spread the material into grease surface.
 Step 8: Quickly roll the material with roti roller so it becomes thin. (As early as possible)
 Step 9: Slightly draw horizontal and vertical lines before it cool.
 Step 10: When it is cool cut in to square pieces.
 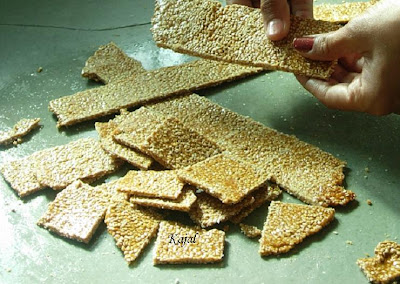 Step 11: Store in container in cool place.


 Step 2: Add shred jaggery in it.
 Step 4: When its color is slightly change in dark side turn off the flame on low.
 Step 6: In low flame mix jaggery and puffed rice very well within a minute then turn off the flame.
 Step 7: Take one cup with cold water and take the 3-4 drops of water in your plam and then make the ladoo.
 Step 8: Here you want extra hand to help coz you make all ladoo as early as possible before the material to be cool.
 Step 10: When it is cool place in container.
  Ingredients:


 Step 11: Store in air tight container in cool place.


